7.4 Payment Entry
- A Payment Entry is a record that indicates a payment has been received or made against an invoice or order.
- Payment Entries are mainly used to record customer receipts, supplier payments, advances, and internal transfers.
Payment Entry can be made against the following documents: Sales Invoice , Purchase Invoice , Sales Order (Advance Payment) , Purchase Order (Advance Payment) , Expense Claim and Internal Transfer
In BrassErp, payments can be captured using:
- Payment Entry (Recommended / Default)
- Journal Entry
To access Payment Entry : Home > Accounting > Accounts Receivable / Payable > Payment Entry
Here are diagrams to understand the flow:
- In Sales :
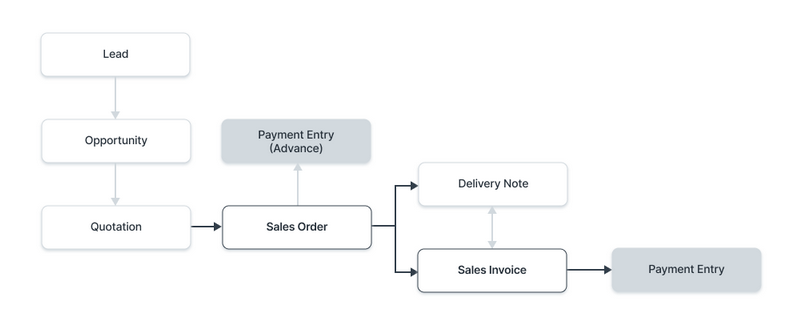
- In Purchase :

1. Prerequisites
Before creating a Payment Entry, ensure the following are created:
- Customer
- Supplier
- Bank Account
- Chart of Accounts
- Company (default accounts set)
If following Sales / Purchase cycle:
- Sales Order (for advance payment)
- Purchase Order (for advance payment)
- Sales Invoice
- Purchase Invoice
2. How to Create a Payment ### 2.1 Create Payment Entry from Invoice
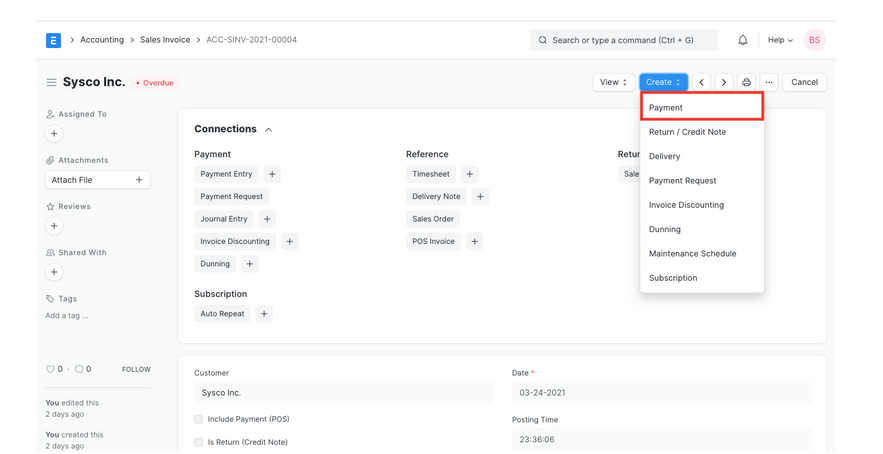
2.1 Create Payment Entry from Invoice
- On submitting a document against which Payment Entry can be made, you will find the Payment option under the Create button.
- Change the posting date.
- The Payment Type will be set based on the transaction you're coming from. The types are 'Receive', 'Pay', and 'Internal Transfer'.
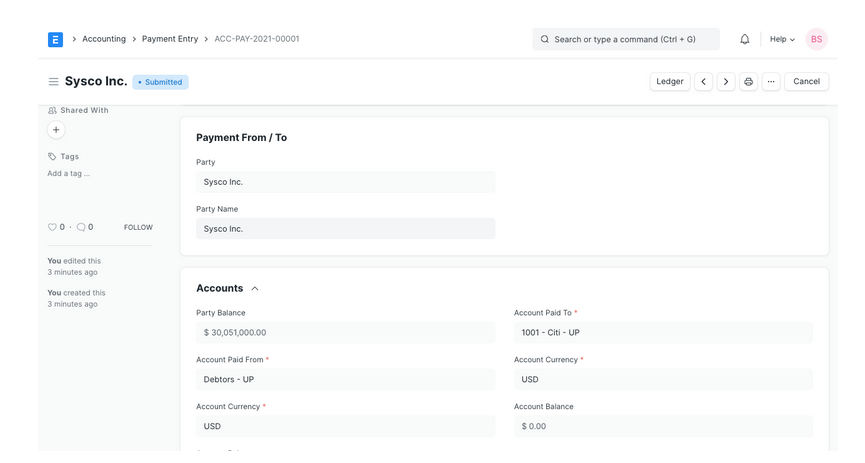
- The Party Type, Party, Party Name will be fetched automatically.
- The Account Paid To and Account Paid From will be fetched as set in the Company form.
- The Amount Paid will be fetched from the Invoice.
- Save and Submit.
3. Create Payment Entry from Invoice
- A Payment Entry created manually will have no order/invoice linked to it. Payments made this will be recorded in the Customer's/Supplier's account and can be reconciled later using the Payment Reconciliation Tool.
- Go to the Payment Entry list and click on New.
- Select the Party Type and the respective Customer/Supplier.
- Select the Bank Account/Cash Account Paid To and Paid From. Enter the Cheque Number and date if bank transfer.
- Enter the Amount Paid.
- Save and Submit.
4. Features
4.1 Mode of Payment
Mode of Payment helps classify payments : Bank , Cash , Cheque , Wire Transfer , Credit Card
TIP : Default account can be set in Mode of Payment master.
4.2 Payment Party Details
- Party Type : Customer, Supplier, Employee, etc.
- Party : Selected party
- Party Name : Auto fetched
- Company Bank Account : Your Company's Bank Account.
- Party Bank Account : The Party's Bank Account.
- Contact Person : If the Party is an organization, a Contact person can be stored here.
4.3 Accounts Section
Party Balance: Outstanding receivable or payable
Account Paid From: Account from which money is deducted
Account Paid To: Account where money is added
Account Currency: Fetched automatically
Account Balance: Balance of selected account
Paid Amount: Total amount paid